Pages

Saturday, September 21, 2013

Gatte Ki Sabji

Gatte ki sabji is a very popular Rajasthani dish. Gatte is besan/gram flour dumplings in spicy curd based gravy. It is an integral part of any Rajasthani thali. This recipe is one of your best options to make when season changes - it is a welcome break from seasonal vegetables.


Ingredients:
 
for Dumplings / Gatta:
 
1. Gram flour / Besan --------------------- 4 tbsp
2. Salt --------------------------------------- 3/4 tsp
3. Red Chilli Powder --------------------- 1 tsp
4. Coriander Powder --------------------- 1 tsp
5. Sauff / Fennel Seeds ------------------ 1 tsp coarsely grounded
6. Hing / Asafoetida ---------------------- 1/4 tsp
7. Oil / Ghee------------------------------- 1 tbsp.
8. Water ------------------------------------- as required
 
 
for Gravy
 
1. Sour Curd ---------------------------------- 2 cups churned
2. Salt ------------------------------------------ 1/2 tsp
3. Red Chilli Powder ------------------------ 1/2 tsp
5. Coriander / Dhania powder -------------- 1 tsp
6. Onion --------------------------------------- 1 medium chopped
7. Cumin Seeds / Jeera ---------------------- 1/2 tsp
8. Hing / Asafoetida ------------------------- 1/4 tsp
9. Oil------------------------------------------- 1 tbsp
10. Water ------------------------------------- as required
11. Coriander leaves ------------------------ 1 tbsp chopped


Method:

1. Take all the dry ingredients in a big bowl and mix them. Make a small well-like structure in the middle. Add oil in it.
 
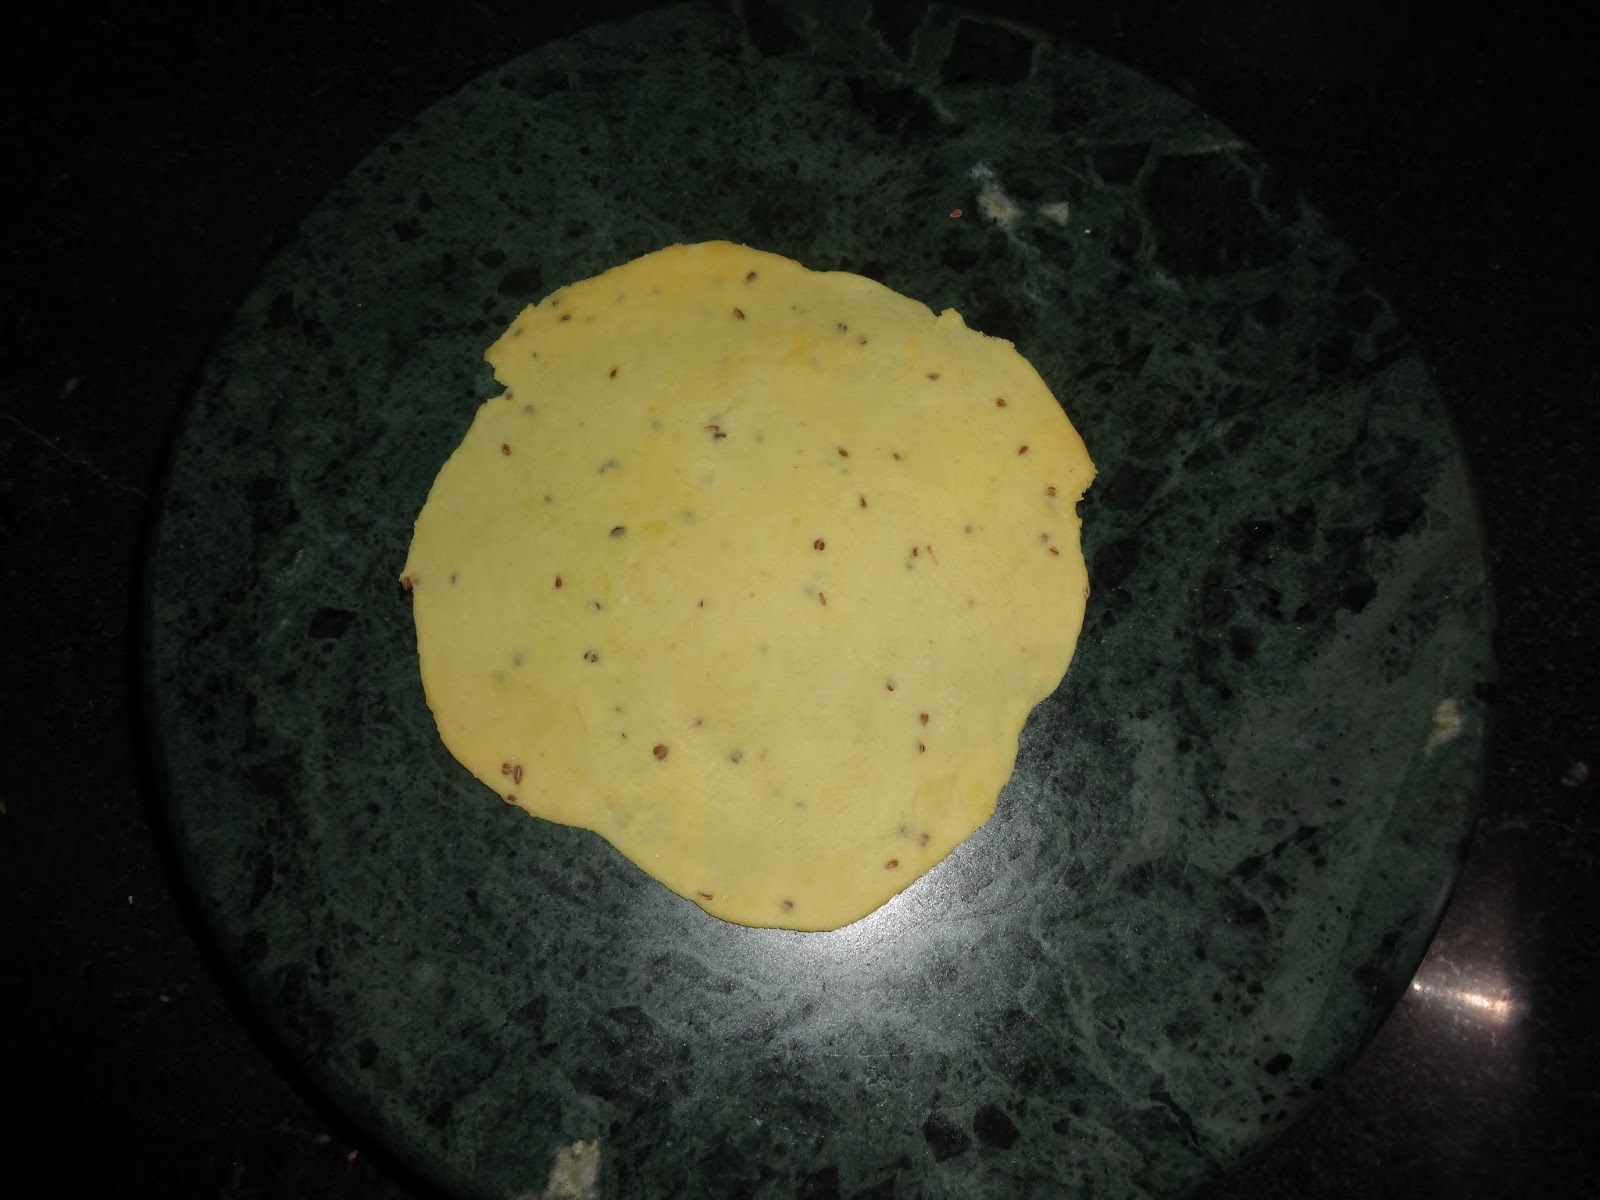
2. Mix well and make a chapatti like dough with water. Knead the dough for 2-3 minutes.
 
3. Make small balls from dough and roll them into shapes similar to soup sticks with approximately 1 cm thickness.


4. Take a pressure cooker. Add rolled gattas. Add enough water to immersed gattas fully. Pressure cook for 1 whistle.
 
5. Open the cooker and transfer the boiled gattas in a bowl. Allow it to cool. Don't discard water as we will use it.


6. Cut these gattas into 1cm pieces as shown. Gatta / dumpling are ready.


 7. For gravy - take a pan. Put ghee in it. Add jeera and hing. Add onions and fry them till they turn golden brown. Add the water in which we boiled the gattas, churned curd, salt, dhania powder and red chilli powder. Boil it while stirring continuously for few seconds.


8. Add gattas into the gravy. Boil it. Cover and cook on low flame for 15-20 mintues or until gattas are softer. Add coriander leaves and serve with chapatti or paratha.


Tuesday, August 27, 2013

Namak Paare karele

Since our childhood we all have been enjoying homemade namak paare, made by our grandmothers and mothers. These are the same namak paare with a twist. Their shape is like karela / Bitter Gourd but taste is same as the good old namak paare.


Ingredients:

Maida / flour --------------------------- 250 gms
Suji / semolina-------------------------- 2 tbsp
Salt --------------------------------------- 1 tsp
Ajwain / Carom seeds------------------ 1 tsp
Luke warm water ----------------------- to knead dough
Oil ---------------------------------------- to fry


Seive maida and suji in a big bowl / paraat. Make a well in between and add salt, ajwain and 1 tbsp oil in it. Now moyen the mixture. Moyen means rubbing flour with oil from the tips of the fingers until the mixture starts to look like breadcrums. Now, add water and knead a puri like dough. Rest the dough for half an hour.
 
Knead the dough again for few mintues. Make small marble size balls. With the help of rolling pin / belan roll a puri of a ball. Draw straight-line cuts in it by leaving 0.5 cm gap between them. Also leave some space on the periphery of the puri. 

 
Now roll it inwards as shown in the pictures below.


Repeat the process for all the dough balls.


Heat oil in a pan / kadhai. Deep fry Namak Paare karele on high to medium heat until golden brown. Then transfer them into colander to drain the excess oil. Let them cool and then store in a air tight container.


Some ideas:
1. Different flavours can be given to these namak paares by adding Mint (Pudina), Seasame etc.
 

Tuesday, July 30, 2013

Dried curd chillies/ Sukhi dahi Mirchi

Known by different names across regions (e.g. Majjiga Mirapa, Challa Mirapakayalu etc.), these dried green chillies are very famous in South India. As is obvious from the name, curd and chillies are the main ingredients for making these chillies.


The entire process will take around a week’s time and is best carried out during hot summers to help effective drying of chillies. Though the process is a bit lengthy, I am sure you will enjoy making of these chillies as much as the final product!
 
In our family, we like to have it as an accompaniment with khichdi, dal-chawal, and curd-rice. Since chillies are soaked in buttermilk during preparation, their pungency mostly goes away. These chillies add a nice mix of sour, salty and mildly pungent flavor to the whole meal :).  Even my seven year daughter enjoys having 4-5 chillies at a time with khichdi!


Ingredients:

In the making process
 
Green Chillies ----------------------------------- 1 kg
Cumin seeds (Jeera) ---------------------------- 1/2 cup
Asafoetida (Hing) ------------------------------- 1 tbsp
Sour Curd ---------------------------------------- 1 litre Churned
Salt ------------------------------------------------ 3 tbsp


At time of cooking

Oil/ Ghee ----------------------------------------- 2 tbsp


Wash the chillies and dry them. Stem should be intact.

Take a chilli and make a slit on one side as shown in the picture below. Repeat the process for all the chillies. Huh...little tiring.


Grind jeera.


Add Hing and salt in it. Grind to mix all.


The curd should be sour...a real sour curd like 3-4 days old curd. Take the churned curd and mix enough water for a butter milk consistency.

Pour the butter milk into a plastic container with a tight lid. Add ground spices into it.

 
Mix Well and add chillies. Press the chillies so that they are well soaked in the butter milk. When you press them they will come up, but will be coated by the buttermilk.


Put the lid and leave this for 2 days on room temperature. Mix the chillies 2-3 times a day so that the chillies which are on surface go down into the buttermilk to soak it. You will notice that gradually the colour of chillies is getting lighter.
 
After 2 days; i.e. the 3rd day morning, take out all the chillies from the buttermilk. Keep them in a colander to stain all the buttermilk. Keep all the buttermilk safe in the container. Dry the chillies in the sun for the whole day. In the evening, put dried chillies in the buttermilk again. Mix well and put the lid.
 
Repeat the process for another 2 days. In this process you will see that the colour of the soaked chillies have changed from green to white. If not, then the same process should be repeated for another 1-2 days.
 
Now dry the chillies and store in an air tight container.


Cooking:
 
Heat oil in a pan. Add 4-5 chillies at a time to fry. Enjoy the yummy chillies.


Some Ideas:
 
1. Always start with small lots of chillies like 250 gms or even smaller. Rest of the ingredients can be taken in proportion of it.
3.When malai/ cream is churned to get butter, the residual liquid / matha (traditional buttermilk) can be used in this recipe.


Wednesday, July 24, 2013

Shahi Paneer

Shahi paneer is a very famous delicacy from North India. This is a very rich dish of paneer with cream and cashews. So, normally its a special occassion dish. 


Ingredients:

Paneer ----------------------------------- 250 gms
Onion ------------------------------------ 2 medium chopped
Tomato ---------------------------------- 3 medium chopped
Cream / Malai -------------------------- 2 tbsp
Elaichi /Green Cardamom------------ 1 powdered
Cashew ---------------------------------- 8-10
Ginger ----------------------------------- 1" grated
Garam masala -------------------------- 1/2 tsp
Green Chillies -------------------------- 2
Bay Leaf -------------------------------- 1
Ghee / Oil ------------------------------- 1 1/2 tbsp


Take a pan. Add ghee and heat. Add Onions and saute for a minute. Onion should not turn brown.  Then add cashews and saute for 2 minutes or until cashews turn light brown. Add Tomatoes and cook until the tomatoes are pulpy. Now cool the mixture and grind into a fine paste. If required add water.

Heat this ground mixture in the same pan. Add a bay leaf and boil it.
 
 
Cook for 2 minutes on low flame. Add Cream and mix well. Then add paneer and elaichi powder. Cook for 2 more minutes. Add garam masala and mix. Serve hot with Chapati, Paratha, Naan or Jeera Rice.


 Some ideas:
1. To make it less creamy/ heavy you can reduce the amount of cream and cashew.

Saturday, June 8, 2013

Wheat Dosa / Godhuma dosa

Wheat dosa is a good option when you have a lack of time or are not in a mood to spend too much time in the kitchen :). Wheat Dosa can be eaten with sambhar and coconut chutney. Or without any accompaniment.


Ingredients:
 
Wheat Flour ----------------------------- 1/2 cup
Rice Flour ------------------------------- 1/2 cup
Jeera (Cumin seeds) -------------------- 1 tsp
Salt --------------------------------------- 3/4 tsp
Onion ------------------------------------ 1 small finely chopped
Green Chillies -------------------------- 2 finely chopped
Coriander ------------------------------- 2 tbsp chopped  
Water ------------------------------------ to make paste
Oil / Ghee ------------------------------- for greasing
 
Take wheat flour, rice flour in a bowl and make a paste by adding water. Do not add too much water at once as it may form lumps. Intially, add water just enough to make a thick paste, then add more for the desired consistency. Batter should be like thick buttermilk.

Heat a non-stick tava, low the flame and grease it. Take a ladle full of batter and pour evenly in the form of a stream on the tava in a circular motion. If there are big gaps, fill them with batter. Drizzle some oil on it. Cook for 2-3 minutes and then flip the dosa. Cook from the other side for 2-3 more minutes.


Serve hot with your choice of accompaniment. We are having it with Chutney podi.


Friday, May 31, 2013

Moong / Channa / Dal Moth Namkeen

Everybody likes Namkeen. The recipes for Moong, Channa, Dal Moth are almost same. Only frying time differs according to the size of the dal. If size is big it will take more time to fry. 


Ingredients:
 
Moong/ Channa/ Masoor dal --------------------- 1 cup
Oil ---------------------------------------------------- to fry
 
Masala:
 
Salt --------------------------------------------------- 1/4 tsp
Black Salt ------------------------------------------- 1/4 tsp
Black pepper powder ------------------------------ 1/2 tsp
Chat masala ----------------------------------------- 1/2 tsp
 
 
Soak the dal overnight or for 4-5 hrs. Wash and drain well. Spread dal on a towel evenly so that all the moisture will be soaked by it.


This is how dal will look like now.


Heat Oil in a kadahi/ Pan. Oil should be very hot - it should be heated to the point so that you will start to see fumes coming out of it.  Add dal in it.  Keep the stove flame high as it needs to be fried at a high temperature, else dal will get hard. When dal starts to come up on the surface of the oil, it means frying is (almost) done. To check that it is crispy and well cooked, see if it will easily break just with a little pressure of fingers. Fry a little more if it is still soft. Once done, take dal out of the oil and keep it in a colander to drain the extra oil.


Then transfer dal from colander to paper napkin for it to absorb all the extra oil.  Let it cool.


Now add the masala and store it in an air tight jar. This will remain good at least for a month. But if you have kids a month :) is a very long time.


Friday, May 10, 2013

Groundnut / Peanut Chutney

Groundnut Chutney - it tastes best with idlis.

At first, when I considered having idlis only with peanut chutney, it didn't seem like a good idea.  Idlis.. only with chutney.. and that too peanut chutney.....no sambhar and coconut chutney!  But eventually when I tried the peanut chutney with hot steaming idlis, the taste was heavenly!  I suggest you to try it at least once, and I can bet that you will fall in love with this fantastic combination!  Even my grandmother wasn't keen on trying it at first, but once she did, I remember how she enjoyed having multiple servings of this chutney!  This was 5 years ago when I had just learnt how to make it! :-)


Ingredients:
 
Peanut (Mungfali) --------------------------1 cup
Onion ---------------------------------------- 1 small
Green Chillies ------------------------------ 2-3
Tamarind ------------------------------------ small marble size ball
Oil ------------------------------------------- 1 tsp
Mustard seeds ------------------------------ 1 tsp
Curry leaves -------------------------------- 5-6
Salt ------------------------------------------- 1/2 tsp


Dry roast peanuts in a pan.  Let it cool down, then remove the skin.


Grind the mixture coarsely like in the picture below.


Now add onion, green chillies and tamarind. Grind into fine paste. Add water while grinding as required.

Remove the ground chutney in a bowl. Take oil in a pan. Add mustard seeds and curry leaves. Add the tampering in the chutney.

The yummy chutney is ready to dig in!


Wednesday, May 8, 2013

What is Gluten-Free

Gluten-Free
 
Gluten is a protein found in wheat, barley, rye grain, triticale, Oats.  A gluten-free diet is a diet that excludes any ingredients containing gluten.

 
Need

Gluten causes inflammation in the small intestine of people suffering from celiac disease (also known as wheat intolerance).  Gluten-free diet serves as a treatment for such people.
 
Gluten Free Food  
 
There are many gluten free food as part of our popular meals. Such as:
  1. Rice
  2. Lentils
  3. Nuts
  4. Fruits and Vegetables
  5. For Non-vegetarians - Eggs, Fish, Meat
  6. Most Dairy products
  
Grains which can be included in gluten free diet
  1. Amaranth (Chaulai/ Rajgiri)
  2. Arrowroot (Araroat)
  3. Buckwheat (Kuttu)
  4. Corn (Makai)
  5. Hominy (Makka ka daliya)
  6. Soya
  7. Quinoa (Bathua seeds)
  8. Millet (Bajara)
  9. Flax (Alsi)
  10. Tapioca/ Sago Pearls ( Sabudana)
  11. Teff
  12. Sorghu (Jowar)
  13. Gram Flour (Besan)
  14. Finger Millet (Ragi)

Always Avoid

People suffering from celiac disease should avoid following:
  1. Wheat, barley, Rye, triticale, Oats.
  2. Semolina / Rava and Maida (refined flour).
  3. Packaged Juices, Pasta, Cereals, Candies, Gravies, Ice creams, Thick soups,  Salad Dressings, Sauces, regular Breads, Cakes and Cookies.
  4. You should also be very careful with products labeled as gluten-free available in Indian marketMany of these products might not have gone through any authentic certification process to ensure that they are in deed gluten free.
You should consult a qualified doctor for getting a more thorough understanding of what all you can have in your diet.
 

Monday, May 6, 2013

Ragi(Finger Millet) Dosa

Ragi dosa is an instant recipe. Unlike masala dosa, it doesn't require any fermentation. Therefore no prior preparation is needed for making it.
 
Ragi (finger millet) is very nutritious; a very good source of protein, iron and calcium. It doesn't have any gluten (a protein found in wheat), and therefore can be consumed by people with wheat intolerance also. Overall, ragi dosa makes up for a very healthy and tasty option for breakfast and as an after school snack.  In my family, everyone loves to have this dosa with Tomato Onion Chutney.


Ingredients:

Ragi Flour ------------------------------------- 1 cup
Wheat Flour ----------------------------------- 1 tbsp
Rice Flour ------------------------------------- 1/4 cup
Salt --------------------------------------------- 1 tsp
Cumin seeds (Jeera) ------------------------- 1/2 tsp
Oil / Ghee ------------------------------------- for greasing


Method:

Take all the ingredients in a bowl.  Make a batter by adding water in it. Batter should be very thin like butter milk.

Heat a nonstick tava. Grease with oil. Tava should be hot. On low flame pour the batter on the tava to while making a round shape. Drizzle oil on it.

Cook on low flame for 1 minute. Than flip the side and cook for another 1 minute.


Your dosa is ready!  Serve hot with Tomato onion chutney.